In a previous article we introduced the Beaglebone Black – a low power, low cost, credit card sized Linux computer available in the UK for around £35 and just $45 in the USA. We have been using the Raspberry Pi since it was first released in early 2012, so we were very interested to try out this similarly priced alternative which promised greater processor speed, 2GB of on board eMMC flash memory for the operating system, and most importantly for the work we do, 7 analog (ADC) inputs compared to zero on Raspberry Pi.
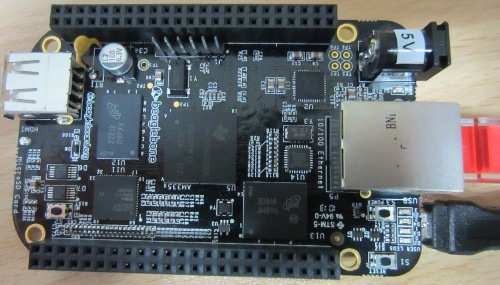
We received our Beaglebone Black (pictured above) around a week ago, and have been playing around with it in any spare time. Getting it set up was very quick and easy following the instructions served up as a webpage from the BBB itself. But then today something went wrong.
While looking on the internet to find any recommendations/suggestions for a VNC (virtual networked computing) server for the BBB I found this recent blog posting by Roger Meike which went through the steps he took to successfully install the X11 VNC server on his Beaglebone Black. This enabled him to interact with its full graphical interface / desktop through his Mac instead of having to hook the BBB up to a separate monitor or TV or only being able to use the command-line interface terminal via SSH.
So, step one, connect the Beaglebone Black to the ethernet cable and USB cable – check everything is working as it should via SSH. Step two, update and upgrade the Ångstrom Linux distribution installed on the Beaglebone. So far so good – seemingly. The command opkg update took very little time to run to completion; the command opkg upgrade took the best part of an hour and a half to run, but didn’t show any errors, and after it was completed everything was working as it had previously – no problems evidenced at all.
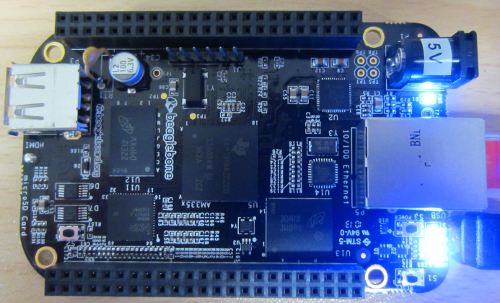
Before embarking on the X11 VNC server installation I decided to reboot the Beaglebone Black, so I entered the reboot command. Next time I looked at the BBB a few minutes later 3 of the 4 user indicator LEDs were fixed on instead of their usual flashing. I attempted to SSH in but could not connect, and entering http://192.168.7.2 via my web browser (which is the usual way of accessing the BBB when it is connected to your computer via USB) resulted in ‘This webpage is not available’ error message.
It appeared that something had gone wrong somewhere, but the start up guide mentioned that the LEDs are fixed on while the eMMC is being flashed with a new distribution from the SD card and that process can take up to 45 minutes. On the off chance that upgrading the distribution without the SD card results in the same thing (and not wanting to turn it off if it was actually doing something), I left the BBB alone for a couple of hours, but the LEDs just stayed on.
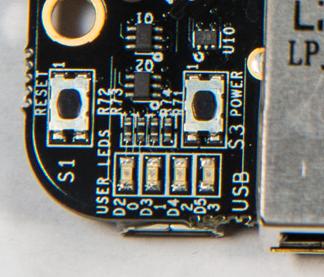
I next pressed the on board reset button. The LEDs turned off, then one turned on (PWR LED), then another turned on (labelled D2), and then a few seconds later LEDs D3 and D4 turned on and stayed on permanently.
Next I unplugged the USB cable and left the Beaglebone Black disconnected from the power that cable supplies for a few minutes. When I reconnected the USB cable to the computer, nothing happened – the computer could not see the BBB whereas it previously recognised it immediately as a USB mass storage device when it was connected. But the LEDs still came on.
I tested there was nothing wrong with the USB port on the computer – it was fine; I tried connecting the BBB to alternative USB ports on the computer, and still nothing, just the LEDs permanently fixed on.
I then hooked the BBB to a monitor via HDMI, but still nothing. It seems that it has turned into an illuminated brick.
Looking around on the internet I found this guide to unbricking Beaglebone Black without Erasing eMMC, as well as comments from other people who have run into similar problems with their BBB. It seems the only way to fix this is to download the latest Ångstrom distribution on another computer, unzip it, get an image writer for Windows, write the image to the SD card, boot from the SD card, and then wait for the image to be copied across to the eMMC. But, this requires a microSD card which I don’t have, and a lot more time. Also, quite a few stories of people going through this process and ending up with an un-bootable BBB. Is it necessary to do this every time the distribution needs updating??
I’ve never had any problems with any Raspberry Pi, and I have some which have been running continuously for months without crashing or any other issues. Therefore this bricked Beaglebone Black is going to be returned – not to be exchanged for another Beaglebone, not for a refund, but for another Raspberry Pi. Sometimes the grass is not greener on the other side – I just wish that the Raspberry Pi GPIO included some analog inputs!
As Nigel D wrote regarding the advantage of Pi over BBB: having the boot stuff and OS on removable media means that bricking the board is that much more difficult, makes it easier to experiment between different operating systems, and makes full backup and recovery easier.
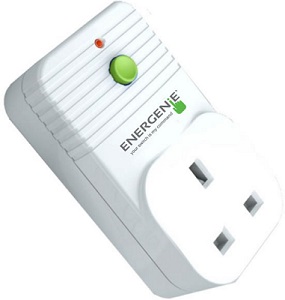
 The Pi-Mote simply plugs onto the GPIO pins of the Raspberry Pi (compatible with both Raspberry Pi B and B+ but for the B it takes up all of the GPIO pins) and then a simple provided Python script is run on the Pi to supply an identifying control code to each of your sockets so you can subsequently toggle them on or off individually (or all at the same time) as and when you desire.