In our article DS18B20 Temperature Sensor with Raspberry Pi we showed how a DS18B20 1-Wire Temperature Sensor can be read by a Raspberry Pi and its temperature displayed. When using a temperature sensor you will normally want to read the temperature at regular intervals and log it for later analysis. While you can do all of this yourself on the Raspberry Pi, there are many free internet services available which greatly simplify the process and make it possible to view your data from anywhere in the world through your web browser with minimal set up time or complexity.
Xively (formerly Cosm) is one such service which we have used and found to be very reliable and well supported. Xively offer a range of commercial cloud data logging and storage with prices starting from $999 per year to tens of thousands. They do however offer a completely free Developer Account which gives full access to the Xively API (the means by which you get your data onto the Xively servers). This account allows you to collect data from unlimited devices (Raspberry Pi’s, PC’s, Arduino’s etc), and unlimited channels (specific data attributes typically generated from sensors connected to those devices).
There are a couple of limitations which will not impact the vast majority of hobbyists. There is a limit of 25 API calls per minute (3 minute rolling average), so you can upload up to 25 sensor readings per minute to have them logged, and any data you upload is only available for 30 days.
Xively and Raspberry Pi
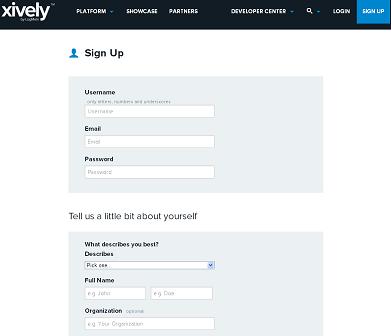
Getting started with Xively is quick. Click here to Sign up to Xively. You just need to choose a username and password, submit your email address, and fill in a few more boxes on a form – your name, location, and areas of interest. You’ll then receive an email to activate your account.
Then click here to view and follow the Xively Raspberry Pi Tutorial – a very well written, comprehensive, and easy to follow guide to getting your first data feed running. The tutorial explains how to set up your Raspberry Pi the first time if you have not already, set up your Xively account so that it is ready to accept data from your Raspberry Pi, how to write a test programme on the Raspberry Pi to start your first data feed, and then have a look at your data as it arrives on Xively.
Xively, Raspberry Pi, and a Temperature Sensor
 Now you have get everything up and running, it is time to do something useful with your Raspberry Pi. We have modified the example programme (Python script) provided in the Xively set up tutorial so that your Raspberry Pi will feed temperature data from a DS18B20 temperature sensor (as per our guide) to Xively. We’ve put that script at the end of this article. Put it in a file named temperaturelogger.py in the directory with the example script from the tutorial making sure to enter your API_KEY, FEED_ID, and the ID for your temperature sensor.
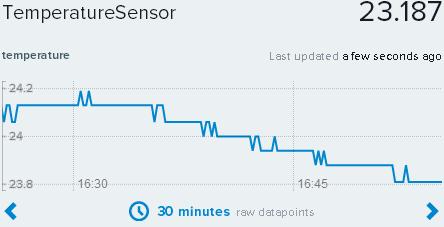
To run this script and start your temperature logger enter python temperaturelogger.py at the prompt and it should start running. Go to your Xively account and if you have everything wired up correctly to your Raspberry Pi, set up as per the tutorial above, and the new temperature reading script entered correctly, a new channel will appear in your account called TemperatureSensor which will receive temperature readings every 10 seconds and display the most recent temperature reading and a graph of past readings.
Once you have checked everything is working as it should, Ctrl-Z to kill the running script on your Raspberry Pi, and this time enter the command:
temperaturelogger.py
#!/usr/bin/env python

import os
import xively
import subprocess
import time
import datetime
import requests

FEED_ID = "YOURFEEDID"
API_KEY = "YOURAPIKEY"

# initialize api client
api = xively.XivelyAPIClient(API_KEY)

# function to read the temperature from ds18b20 temperature sensor on i2cdef read_temperature():
   tempfile = open("/sys/bus/w1/devices/YOURTEMPERATURESENSORID/w1_slave")
   thetext = tempfile.read()
   tempfile.close()
   tempdata = thetext.split("\n")[1].split(" ")[9]
   temperature = float(tempdata[2:])
   temperature = temperature / 1000
   return temperature

# function to return a datastream object. This either creates a new datastream,
# or returns an existing one
def get_datastream(feed):
  try:
    datastream = feed.datastreams.get("TemperatureSensor")
    return datastream
  except:
    datastream = feed.datastreams.create("TemperatureSensor", tags="temperature")
    return datastream

# main program entry point - runs continuously updating our datastream with the
# latest temperature reading
def run():
  feed = api.feeds.get(FEED_ID)

  datastream = get_datastream(feed)
  datastream.max_value = None
  datastream.min_value = None

  while True:
    degreesCelcius = read_temperature()
    datastream.current_value = degreesCelcius
    datastream.at = datetime.datetime.utcnow()
    try:
      datastream.update()
    except requests.HTTPError as e:
      print "HTTPError({0}): {1}".format(e.errno, e.strerror)

    time.sleep(10)

 run()