Having finally managed to obtain a micro:bit, the first thing we wanted to test was the power consumption at different input voltages.
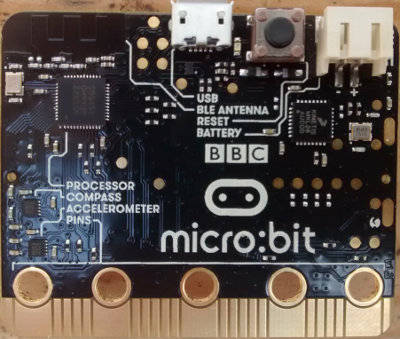
The micro:bit is supplied as a kit together with a 2xAAA battery holder which plugs into the micro:bit, two cheap generic AAA cells, and a USB cable for connecting the micro:bit to a PC to upload your code to it (and which can also be used to power the micro:bit via the onboard voltage regulator).
The input voltage for micro:bit is labelled as 3 Volts. Alkaline AAA cells such as those offered by Duracell supply around 1.5-1.7 Volts each when fully charged. Rechargeable NiMH cells, something around 1.25 Volts. Therefore, since the micro:bit is designed to be battery powered by TWO AAA cells, it must be able to operate reliably from a wide range of input voltage – e.g. just 2V from a pair of depleted rechargeable NiMH cells, up to at least 3.4V to cope with a pair of brand new out of the box Duracell cells.
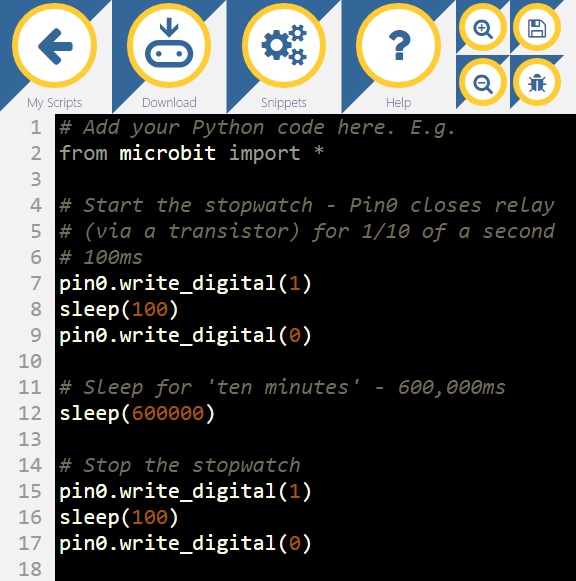
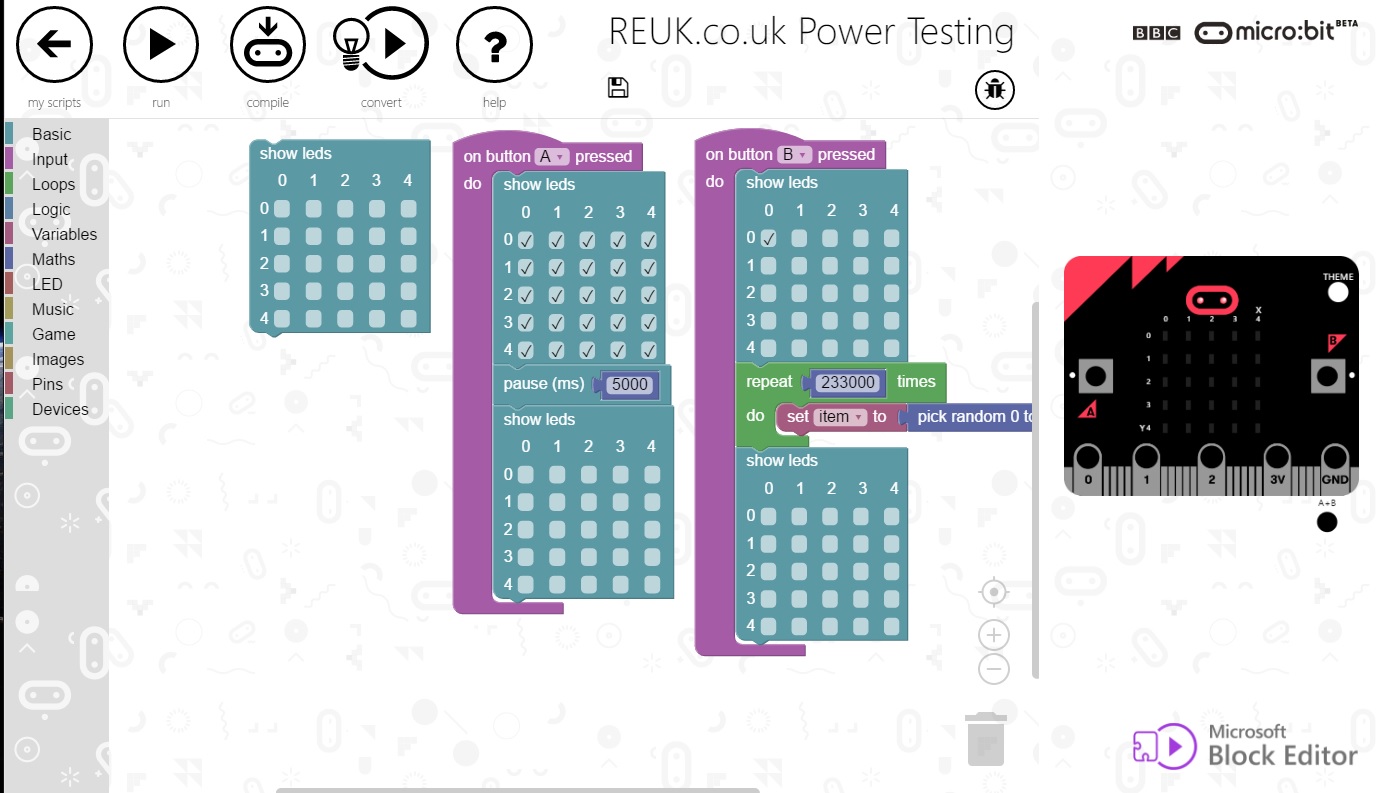
In order to test power consumption, we used the Microsoft Block Editor (available for use at the official micro:bit website) to build a simple project as shown below. Click on the image to see it in full size.

This will first turn off all of the LEDs in the 25 LED array so the micro:bit is not doing anything apart from background processing. If the A button on the micro:bit is then pressed, all LEDs will light up and remain on for five seconds. If the B button is pressed, the processor of the micro:bit will be worked hard by generating 233,000 random numbers. (The reason that 233,000 was chosen was that it took the micro:bit 10 seconds to complete that many iterations of the loop, and that gave the time necessary to reliably measure the minimum and maximum current drawn by the micro:bit while under this heavy load).
Powering the micro:bit from a variable DC power supply starting down at 1.5V, the voltage was increased until it was sufficient to have the LEDs turn on. We found this voltage to be at around 1.80V. We then tested different input voltages from around 1.8V up to just over 4.0V in 0.2V steps with the micro:bit either resting, with all the LEDs on, and then with it doing repeated random number generation.
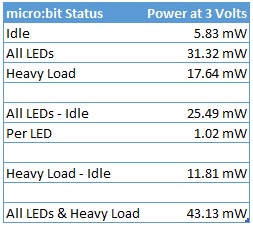
We found that the current draw fluctuated constantly (by around 1mA), probably due to the internal workings of the micro:bit which we have not yet studied in detail. We found that in all three tests for all input voltages, there was a minimum current, a maximum current, but the typical current draw was found to be around one-third of the way between the minimum and maximum. We called this the mean (average) for this rough and ready set of experiments and the final table of results is given below.
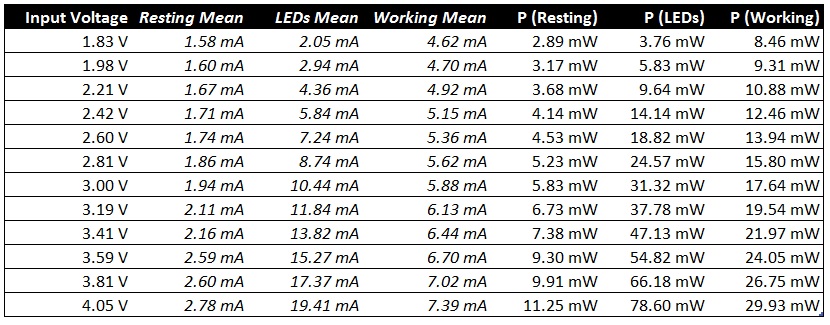 Each row in the table shows a different input voltage. The Resting (Idle) Mean, LEDs Mean, and Working Mean have been described in the previous paragraph. P(Resting), P(LEDs), and P(Working) are calculated using Ohm’s Law that Power equals Current multiplied by Voltage.
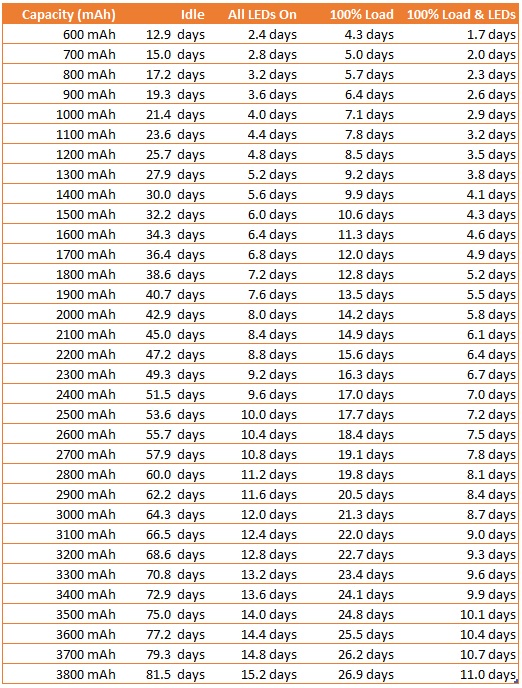
It is immediately apparent the massive effect that input voltage has on total power consumption. At 1.83V input voltage with all the LEDs on, only 3.76mW is consumed, but with an input voltage of 4V, 78.7mW is consumed – 21x as much power. Even with input voltages of 3V and 2.4V (typical alkaline and NiMH rechargeable voltages respectively) the power consumption is 31mW compared to 14mW – more than twice as much. Therefore, unless you need the LEDs to be very bright, it is better (if power consumption is important to you) to use a low input voltage, or to use the built in PWM to reduce the brightness of the LEDs and therefore their power consumption.
For projects not requiring the LEDs, the power consumption is not so affected by input voltage. At idle, approximately twice as much power is consumed at 4V as it is at 1.8V. Under heavy load, more than three times as much power is consumed at 4V compared to 1.8V. Therefore, if the LEDs are not required, it is more power efficient to use a good voltage regulator to bring the input battery voltage down to around 2V than it is to just run the micro:bit at the battery voltage. Important things to consider if you intend to power your micro:bit by solar power or some other limited power source.
Finally we noted that the 10 seconds it took the micro:bit to generate 233,000 random numbers in our experimentation was completely unaffected by changes to the input voltage – i.e. it took 10.0 seconds with an input voltage of 1.83V and still took 10.0 seconds with 4.05V. Again this shows that where the LEDs are not being used, a low input voltage is the way to go if you need to minimise power consumption.
Bookmark microbit.me.uk to view all our previous and future micro:bit related articles.
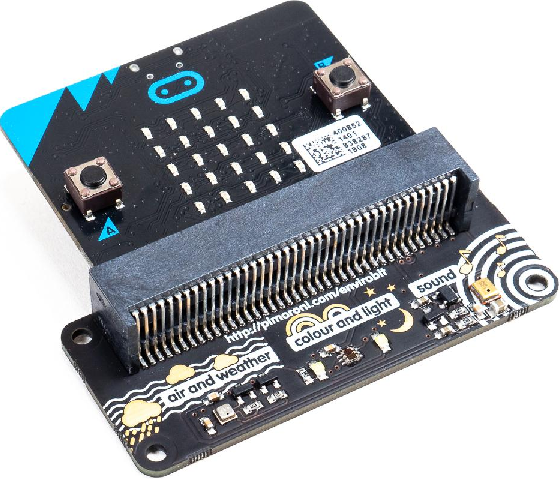
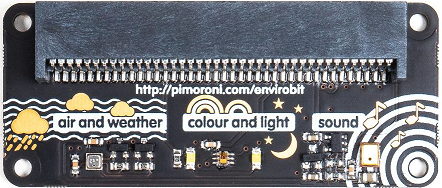 Pictured above is the new enviro:bit for micro:bit from Pimoroni – available for £20. This device has a collection of sensors which can add be read easily from Microsoft MakeCode Editor or directly via MicroPython for more advanced projects and programmers.