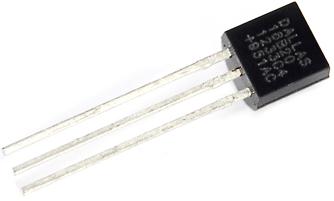
The Raspberry Pi does not have any ADC (analogue to digital converter) pins in its GPIO, and so a digital temperature sensor should be used. The sensor of choice around the world is the Dallas DS18B20 1-Wire temperature sensor pictured above. They are relatively cheap, very easy to find, easy to use, and supply readings accurate to +/-0.5 degrees across the range -10 to +85 degrees Celcius.
In order to interface this with the Raspberry Pi we just need one resistor – a 4k7 which acts as a pull-up resistor – and connect everything up as shown below:

Raspberry Pi and DS18B20 Temperature Sensor – Python
Log on to your Raspberry Pi, and at the command prompt enter the following:
sudo modprobe w1-gpio && sudo modprobe w1_therm
(to avoid having to manually enter this command every time you re-boot your Pi, edit using nano or similar the file “/etc/modules” adding the lines w1-gpio, and w1_therm to the end of the file.)
May 6th 2015 Update
Since the Raspbian operating system was updated back at the end of January 2015 (kernel 3.18.8 and higher) which enabled Device Tree, the above steps do not result in the temperature sensor(s) being detected.
Now you need to enter the following at the command prompt:
sudo nano /boot/config.txt
to open the /boot/config.txt file for editing. Then scroll down to the bottom of the file, and add the line:
dtoverlay=w1-gpio
Ctrl-X to save the amended file.
Finally reboot the Raspberry Pi so that the changes take effect.
Now at the command prompt enter:
ls -l /sys/bus/w1/devices/
to see a list of the devices currently connected to your Raspberry Pi.
Your temperature sensor will appear with an address in the format 28-00000xxxxxx. Below you can see that our temperature sensor address was 28-00000283c6cd. Each DS18B20 temperature sensor has a unique hard-coded address so that you can connect up multiple temperature sensors when required and still read them individually.
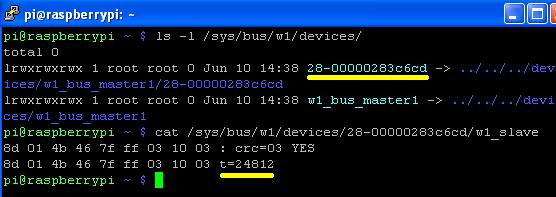
Having found your temperature sensor, type in the following at the command prompt to open the sensor file and view the temperature reading:
cat /sys/bus/w1/devices/28-00000283c6cd/w1_slave
(making sure to substitute in the address for your own temperature sensor of course.)
Above we can see that the output from this command is two lines of data. At the end of the second line after “t=” is a numerical value. This value is 1000 times the temperature of the sensor in degrees Celcius. Therefore in our example where we see t=24812, the temperature readings was 24812/1000=24.812 degrees Celcius.
Reading temperatures from the command line like this is not very useful. In general we will want the temperature to be measured at regular intervals and either displayed somewhere or logged in a file for later analysis. In order to achieve this we need to write a script. Here is our Python script to measure and display the temperature once every second:
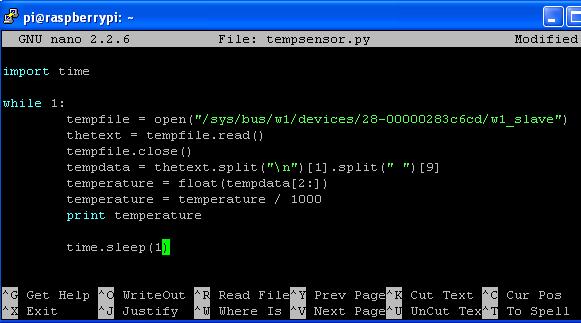
Without going into great detail (click here if you want to learn Python), once per second this script reads in the temperature sensor file, gets the second line, splits it into its space-delimited elements, gets the tenth of these elements (denominated ‘9’ since ‘0’ is the first element), dumps the first two characters (“t=”) of this element, and turns what remains (24812 in our example) from a string into a numerical value which is then divided by 1000 to give us the temperature which is then printed to the screen.
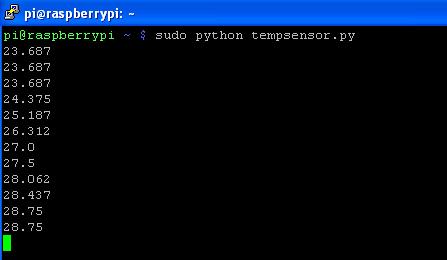
The above screenshot shows the script running while the temperature sensor is being held causing it to warm it up.
If you would like to connect more than one temperature sensor to your Raspberry Pi, then click here to read our article Connect Multiple Temperature Sensors with Raspberry Pi.
Quick Display Temperature on Command Line – Bash
Instead of writing a Python script to get the temperature reading from the sensor, it is possible to write a one line command which will read the sensor, extract the temperature from the rest of the returned data, and process the result using Bash on the Raspberry Pi command line.
There are many ways to achieve this, but here is one example using sed and awk:
cat /sys/bus/w1/devices/28-00000283c6cd/w1_slave | sed -n 's/^.*\(t=[^ ]*\).*/\1/p' | sed 's/t=//' | awk '{x=$1}END{print(x/1000)}'
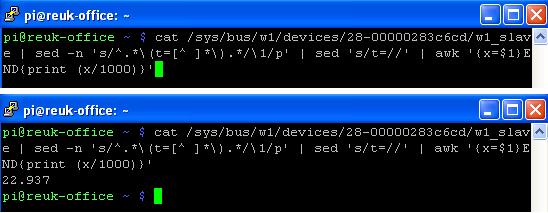
The pipe character “|” is used to pass the output from one command into the next command. The script above first reads in the temperature from the sensor as before returning the two lines of data, the last part of the second line of which is t=XXXXX where XXXXX is the temperature in millidegrees Celcius. We then use sed to find this ‘word’ beginning with ‘t=’ in the data and then pipe it to a second sedcommand which strips off the ‘t=’. Finally the numerical result is piped through to an Awk command which divides it by 1000 and displays the temperature in degrees Celcius.
Obviously you would not want to be typing that long line in every time you wanted to check the temperature of your sensor, so you could create an alias:
alias checktemp="cat /sys/bus/w1/devi......x/1000)}"
so that whenever you type in checktemp at the prompt, the commands will be run.
Alternatively you can save the commands as a shell script. To do this open the text editor with the command:
sudo nano checktemp
which will create an empty file called checktemp. Type in:
#!/bin/bash
on the first line, and then enter the cat /sys/bus… etc commands on the second line. Press Ctrl-X to exit and save the file. To make this file executable (so that we can run it) enter:
chmod +x checktemp
and finally move it to the /usr/bin directory where most executable files are stored:
mv checktemp /usr/bin/
Now when you type in checktemp at the command prompt, your shell script will be run and the temperature reading from the sensor will be displayed.
Buy DS18B20 Temperature Sensors
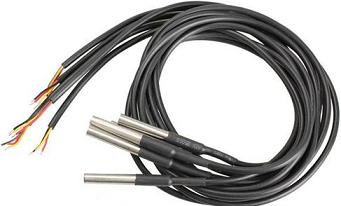
DS18B20 temperature sensors are available as bare components shown at the top of this article, but now, as shown above, it is possible to purchase warterproof DS18B20 sensors – DS18B20 sensors fitted into stainless steel tubine filled with epoxy and with a decent length of cable attached. The set of five shown above for example were available for just £6.53 including air mail delivery from Hong Kong. Click here for links to purchase Waterproof DS18B20 Temperature Sensors, or here for the bare component DS18B20 sensors.
Temperature Logger with DS18B20 and Raspberry Pi
Click here to find out how to turn your Raspberry Pi and DS18B20 into a Raspberry Pi Temperature Data Logger so you can view your temperature data from anywhere in the world over the internet.