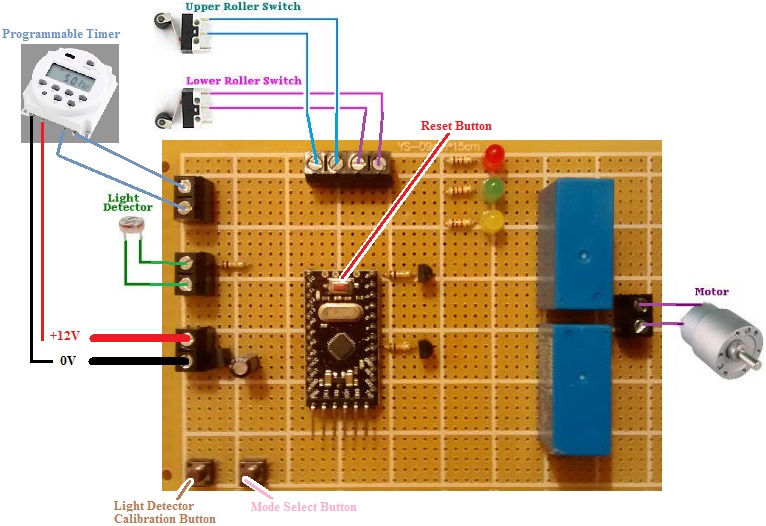
We are often requested to build simple thermostats – devices to turn something on or off depending on a measured temperature. Pictured below is an example of one such thermostat we made recently using an Arduino Pro Mini.

This particular thermostat was designed to keep a 12V 2A output turned on unless the temperature measured on a waterproof DS18B20 digital temperature sensor reaches above 80°C. The output must then remain off until the measured temperature has fallen to below 70°C.
The thermostat was designed to control a low voltage pump, turning it off if the water in a hot water tank fed by a solar water heating panel gets to be too hot. The 10°C temperature difference between the turn off and turn back on temperatures is hysteresis to prevent the pump being turned on and off rapidly multiple times.
In the image above a MOSFET is used to switch the small pump on and off, but typically a relay would be used in most pump controlling thermostats so that high currents and high voltages can be switched by the low voltage powered thermostat. Therefore, in the Arduino sketch, all references are to a relay. The relay will need to be connected to the relevant Arduino pin via an NPN transistor.
Here is a poorly drawn and badly photographed circuit diagram of the thermostatic relay controller. Click on the image to view it in larger size.
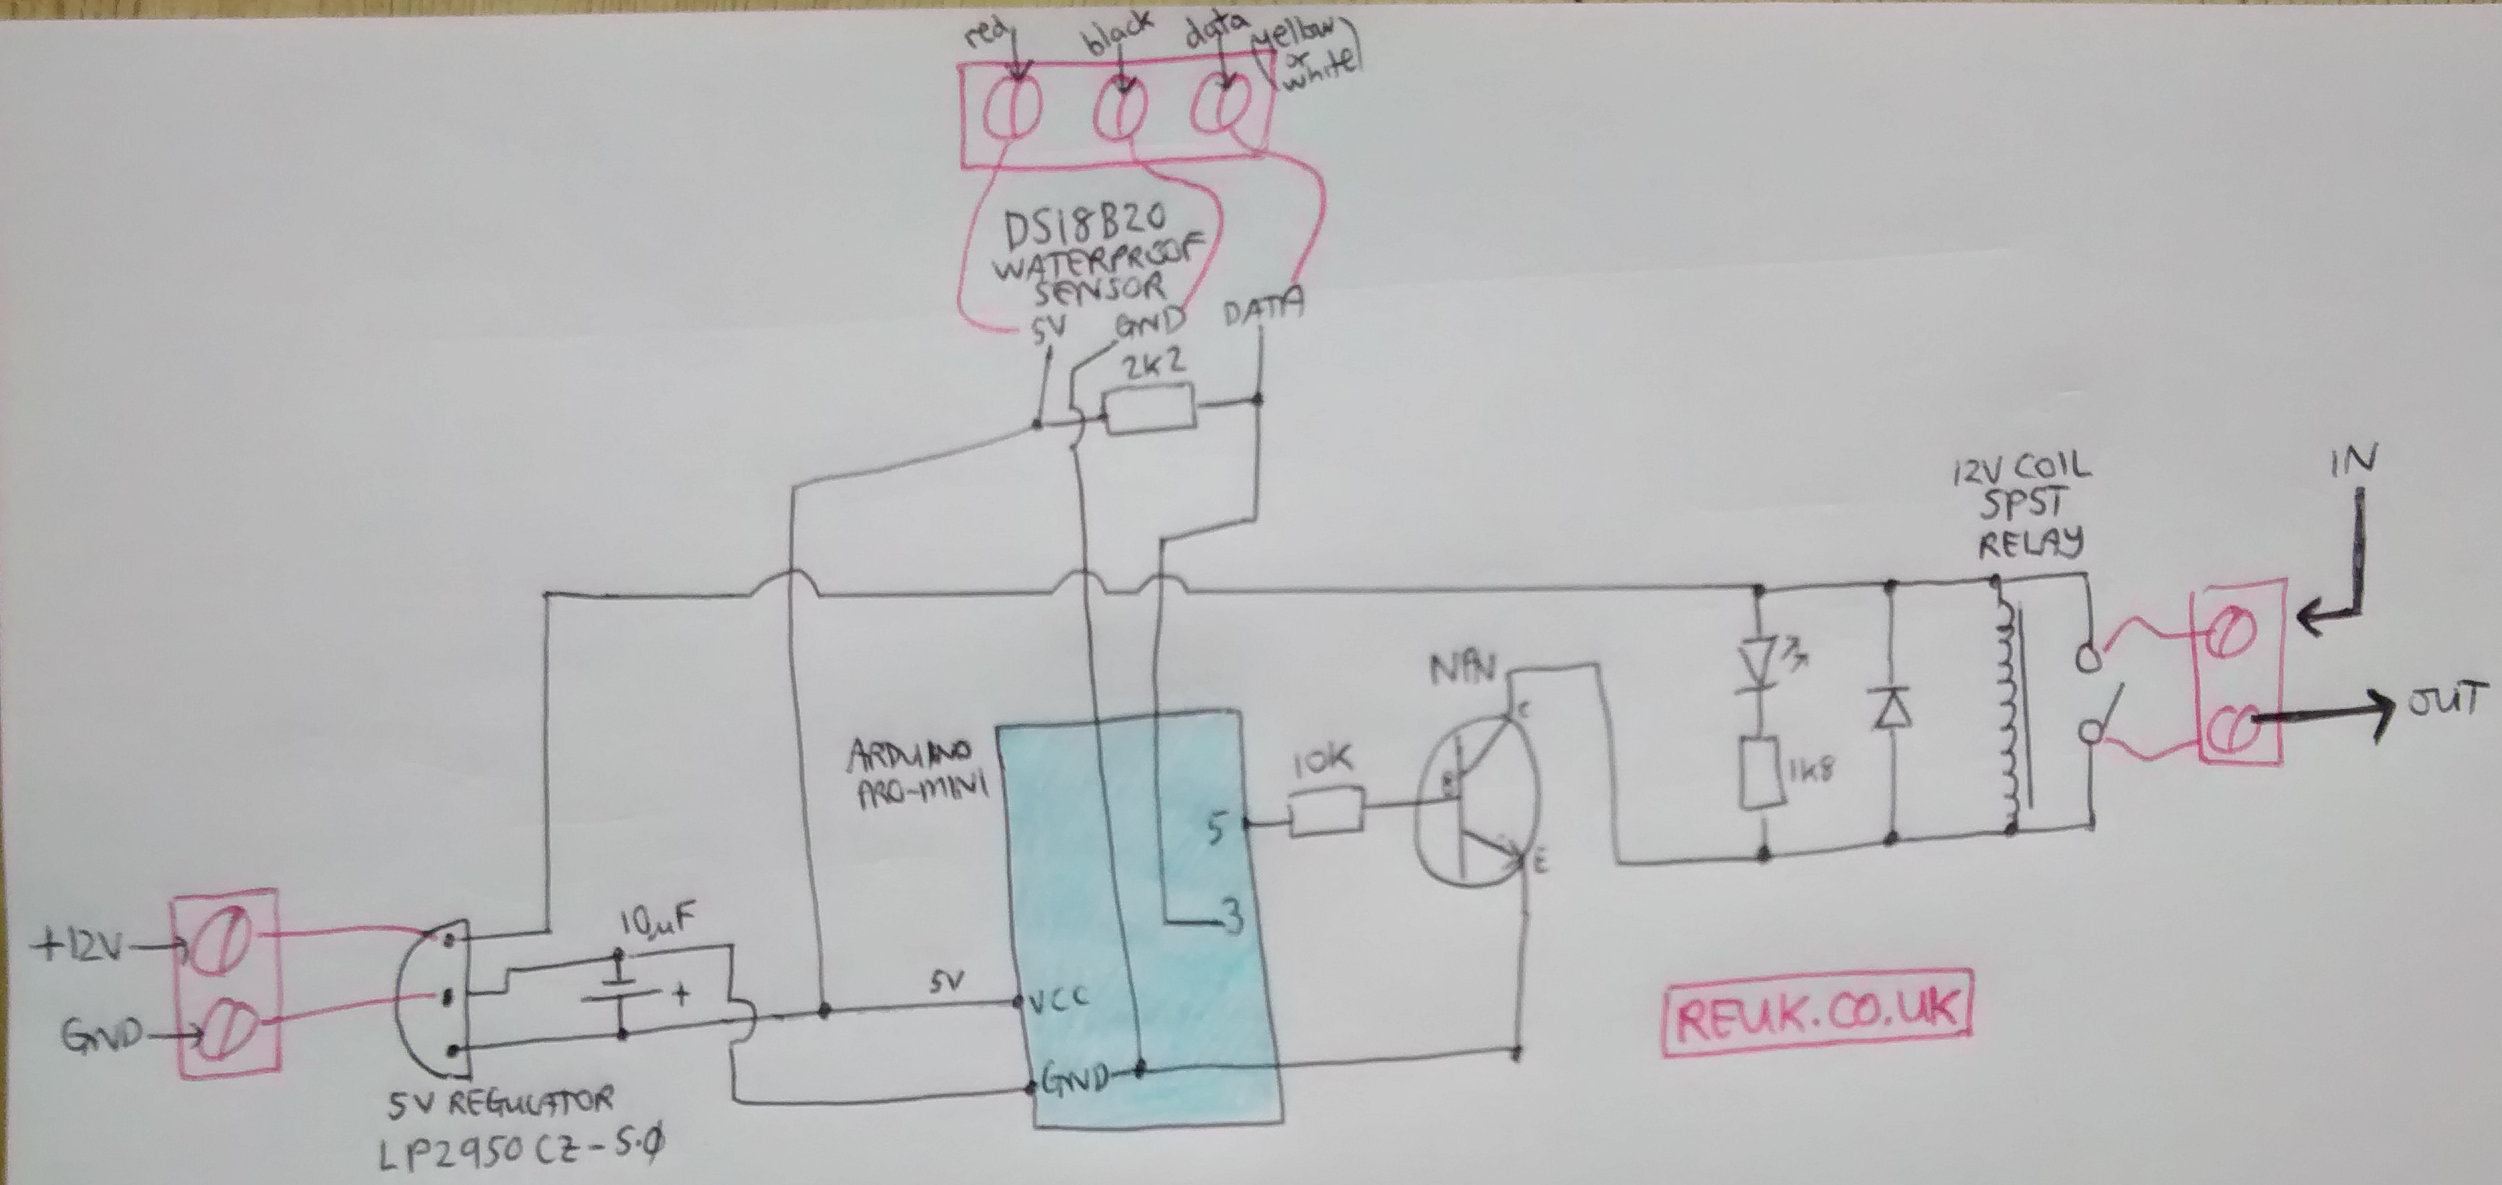
We used an Arduino Pro Mini because of its small size and price, but any Arduino board could be used for this type of controller.
While the Arduino Pro Mini has an on board 5V regulator, we prefer to use an external low drop 5V regulator (lp2950cz-5.0) because they are much more robust and will cope with higher input voltages – for example 12V batteries while they are being heavily charged.
The red LED shown on the circuit board at the top of this page is not used in this project.
Here is the full sketch (source code) for this thermostat
/*
 * REUK.co.uk - 2017
 * This is a thermostat which will keep a relay closed
 * until the temperature measured reaches 80 degrees C, and then will then
 * then re-close the relay only when the temperature falls to 70 degres or below.
 */

// For the temperature sensors
#include <OneWire.h>
#include <DallasTemperature.h>
// Data wire plugged into pin 3 on the arduino
#define ONE_WIRE_BUS 3

// Setup a oneWire instance to communicate with any OneWire devices (not just Maxim/Dallas temperature ICs)
OneWire oneWire(ONE_WIRE_BUS);

// Pass our oneWire reference to Dallas Temperature.
DallasTemperature sensor1(&oneWire);

const int relay = 5;

// Fixed temperature thresholds - turn off output at >80C, and turn back on again when <70C
const float onTemp = 70.0;
const float offTemp = 80.0;

// Keep track of whether the relay is energised/closed (1) or open (0). Start with closed (1).
int relayStatus = 1;

void setup(void)
{
 // Start up the library
 sensor1.begin();
 //set the resolution to 10 bit ADC
 sensor1.setResolution(10);

 // Set up the relay output for the arduino, and start with it high
 // since the thermostat only turns off at >offTemp degrees.
 pinMode(relay, OUTPUT);
 digitalWrite(relay, HIGH);
}

void loop(void)
{
 // Read in the temperature of the sensor
 sensor1.requestTemperatures(); // Read temperature of sensor1
 float sensorOneTemperature = sensor1.getTempCByIndex(0);

if(relayStatus == 1 and sensorOneTemperature >= offTemp-0.00001){
 // Relay is currently closed, but the temperature exceeds offTemp - therefore open the relay
 digitalWrite(relay, LOW);
 // Remember the new status
 relayStatus = 0;
 }

if(relayStatus == 0 and sensorOneTemperature <= onTemp+0.00001){
 // Relay is currently open from a previous high temperature event, but now the temperature
 // is below the threshold so close it again
 digitalWrite(relay, HIGH);
 // Remember the new status
 relayStatus = 1;
 }

// Wait 1/10th of a second before we measure the temperature again.
 delay(100);
}